Installing Epson TM Drivers
 1. First put the CRE CD into the CD-ROM drive of your computer. If a screen automatically comes up, just close it. If you do not have the Cash Register Express CD the drivers can be downloaded
.
2. Go into 'My Computer' and right click on the CD drive that you put the CD in. A menu will come up, on this menu click OPEN.
3. Now look for a folder called 'Epson TM Drivers' and double click on it. 4. In this folder you will see a file called Tdr161e.exe, double click on it and it will bring up the Epson TM Driver install wizard.
5. Once the wizard is up just click the NEXT button on the first two screen and click the FINISH button on the third and final screen.
6. Now you must start the ADD PRINTER WIZARD. The way you get to the wizard may vary a little depending on which version of Windows you are using. You can usually go to the control panel and then click on either: printers & faxes or printers & other hardware and here you will find the ADD PRINTER icon.
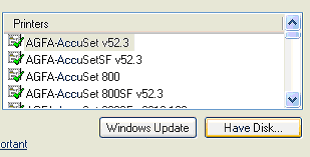
7. Once you have found the ADD PRINTER icon just double click it and follow the prompts. When you get to the part where it asks you to select the manufacturer and model of the printer you will click the HAVE DISK button.
8. Now you must click the BROWSE button and select 'Local Disk C' and then the TMDRVE folder. In here you will select the version of windows that you are using. ( NOTE:if you are using Windows XP the you must select Win2000 folder.) Then double click the file that is in the folder you choose.
9. That will bring you back to the previous screen where you chose BROWSE initially, this time click OK.
10. Now you should be back to the add printer wizard. Continue to follow the prompts through the wizard and as long as the test page prints correctly you have successfully installed the EPSON TM driver for your printer.
To Download Epson Drivers
Or Other Name Brands .. CLICK HERE
Return to the POS library .
Contact Us for the Best Deals Anywhere: 1-866-468-5767


